In this tutorial I will be explaining how to manage 2D animation states for characters in Unity3D using the new 2D tools that shipped with version 4.3.
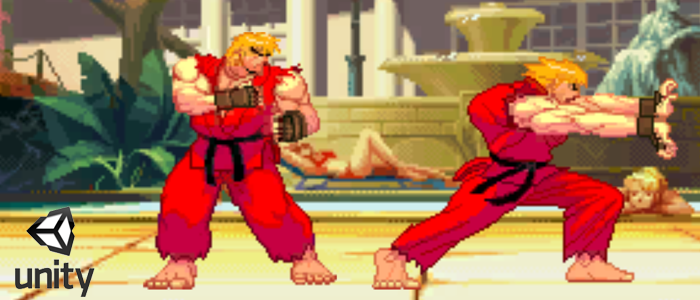
This process will include importing and slicing a Sprite Sheet (Ken from Street Fighter), assigning animation states with the new animation controller, and scripting simple keyboard controls to change the animation states.
read on to find out more!
Step 1: Create a new project
First thing we will want to do is make sure our Unity3D version is up to data and then create a new project.
In the Unity Project Wizard, select ‘2D’ from the drop down highlighted in the image below then click ‘Create’. If you do not have this drop down, you are using an old version of Unity3D.

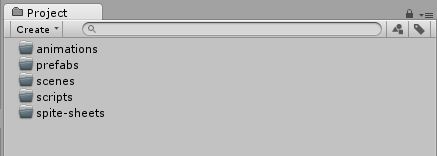
We will now want to create a few folders to help organize our project. In the project panel create the following 5 folders.
Step 2: Import and setup the Sprite Sheet
What are sprite sheets?
In a nut-shell, a sprite sheet is a way of packing images together as one image, which is then used to create animations and sprite graphics which lower memory usage and increase performance of games. if you want to make high performance 2D games, you should be using them.
In this tutorial I will be using the sprite sheet below, Please download it here – Ken Sprite Sheet – and place it the sprite-sheet folder you created
![]()
Once you have placed the sprite sheet file into your sprite-sheet folder, clicking it in the Project panel will show you several options as shown below.

We will want to change a few of the default settings to better suit our needs, firstly in the ‘Sprite Mode’ drop down, change it to ‘Multiple’. This tells Unity that our sprite sheet has more then one image.
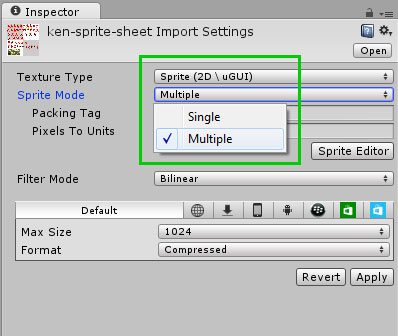
Note* Make sure the ‘Texture Type’ is set to Sprite 2D, this should be selected as default if you created a 2D project in step 1. If not, you can change the settings in Edit > Project Settings >Editor then selecting ‘2D’ for the Default Behavior Mode.
Ok, so lets see some Unity magic, click and open the Sprite Editor.

Step 3: Slicing up Sprites in the Sprite Editor
The Sprite Editor is one of the powerful new 2D work-flow features introduced to Unity3D.
It allows for easy animation setup and management. Lets start By clicking the ‘Slice’ drop down in thye top left corner of the Sprite Editor window.
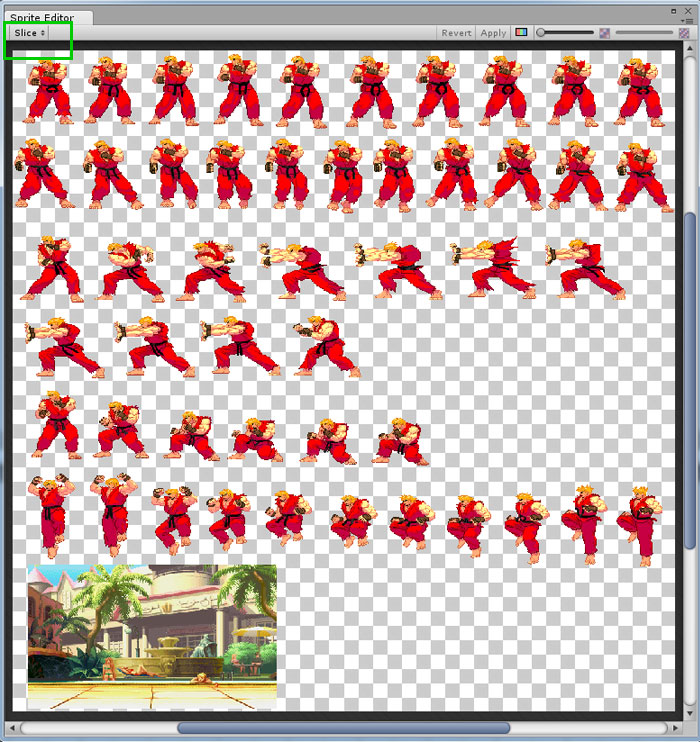
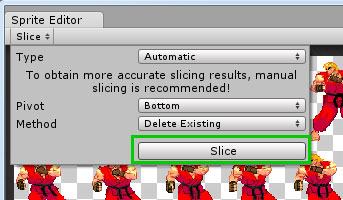
Set your settings as shown below. By setting the Pivot to ‘Bottom’ it sets the pivot point to the center bottom of the sprite, and slicing ‘Type’ in this particular case should be set to be automatic. Then click ‘Slice’.
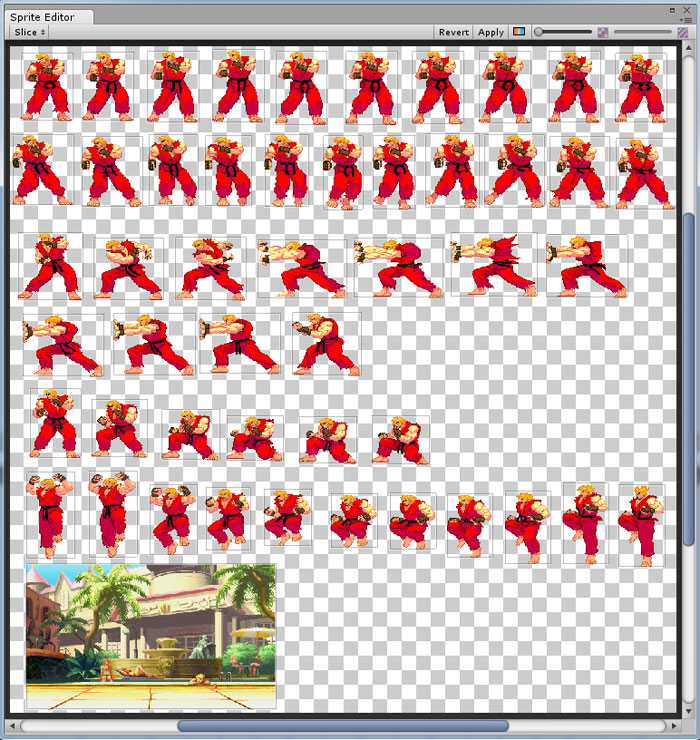
Unity has now separated all the sprites, this is really cool!
Each sprite should have its own bounding box, clicking them give information on each sprite and allow fine tuning of sizes and pivot points. One useful thing you can do is rename each sprite, doing so will more easily allow you to differentiate which image goes with which animation.
Sometimes if the graphics on the sprite sheet are too close together, there will be problems with Unity determining where one sprite ends and another starts. If this ever happens, I recommend opening the file in Photoshop and manually re-positioning the problematic sprites. To avoid this happening, its important to use a good texture packing program. Texture Packer is good for this, as well as Flash CS6 / Flash CC.
If you are happy with how your sprites are sliced up, click ‘Apply’ in the top right corner of the Sprite Editor window.
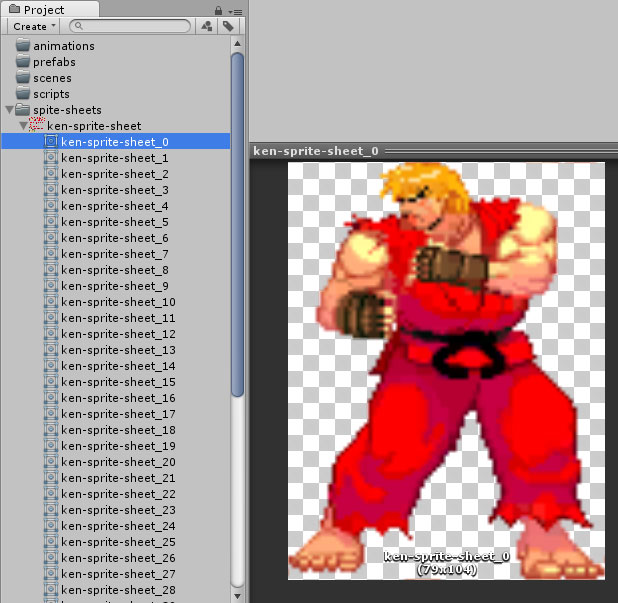
You will see now in your Project panel, Unity has created an image for each of the slices, WHAT IS THIS SORCERY!!??
These images can now easily be used to create animations. Freaking awesome.
Step 4: Creating Animations from Sprite Sheet slices
To create animations from our newly created sprite sequences is easy as pie,
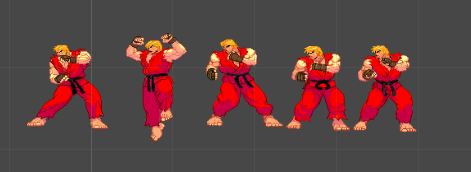
lets start with the Idle animation which is made from frames 0 to 9. Simply select all the images for a specific animation and drag them into the scene view.

This will prompt you to save a new animation, name it ken_idle.anim and save it to the ‘animations’ folder we created earlier.

Continue this for the all the animtions
idle = frames 0 to 9
walk = frames 10 to 20
hadooken = frames 21 to 31
crouch = frames 32 to 37
jump = frames 38 to 48
By doing this you will end up with the 5 animations in your project > animation folder
You will see Unity has also created animation controllers in your animations folder for each of the Animations. You can delete these additional files if you like, as we will be creating a ‘Master Animation Controller’ for the Ken character, DO NOT delete the files highlighted in green, as these are your animations.

You should also have all the animations sitting in the scene view. If you run your project you will see them all animating at once.
Delete all the animations from the scene view.
I have decided to break this tutorial into several parts,
In Part 2, we will continue with setting up the Player object, State Machine and animation Controller.
Check out part 2 here: http://johnstejskal.com/wp/creating-2d-animations-from-sprite-sheets-in-unity3d-pt2/
Also, Let me know what you think about the new game I am working on called Blood And Mead:


Great! When will you post the part 2?
Where is part 2 ?
Part 2 will be coming over the next few days! Turns our explaining the new Unity Animation Controller takes a lot of screen shots than I expected, so it’s taken me a bit longer to find the time 🙂
Where is part 2?
linked at the bottom of the post 🙂
http://johnstejskal.com/wp/creating-2d-animations-from-sprite-sheets-in-unity3d-pt2/
ken-sprite-sheet.png does not exist (johnstejskal.com/blog-stuff either)
Should be sorted out now, thanks for letting me know
[…] Managing 2D Animation States in Unity3D […]
With the crouch animation I got deformed sprite into animation timeline.
It seems to depend on the different height of the sprites from stand to crouch.
It’s correct to use Automatic slicing for different sprite height, or better to use Grid slicing?
Sorry for the late reply. You shouldn’t have to use Grid, Automatic slicing should work fine, make sure however the pivot point is set to middle bottom in the sprite editor. if you are still having problems send me an email with a screen shot johnstejskal@gmail.com
hello,my friend told me slice by grid is cleaner,i am confused can give me clear thought about pro and cons of both and when to use them
This is a great Tutorial!
[…] Managing 2D animation states in Unity3D : Part 1 – Creating animations from Sprite Sheets […]
I made a sprite animation plugin that uses another workflow and it’s timescale, framerate and keyframe independent.
Asset Store: https://www.assetstore.unity3d.com/#!/content/34067
nice tutorial…thanks a lot for this simple but superb tutorial.
what is the softwere?
[…] the tutorials from http://johnstejskal.com/wp/creating-2d-animations-from-sprite-sheets-in-unity3d/ on Creating animations from sprite […]
Hello John!
Even so this is quite old, still thanks for showing this to the world. That was an easy, down-to-earth explanation, thanks a lot!
Best regards from Germany
Max