In this post i will be walking through the process of setting up TypeScript on jetBrains WebStorm IDE.
Step 1.
Download and install the latest TypeScript SDK from the microsoft website
http://www.microsoft.com/en-us/download/details.aspx?id=34790
Step 2. If you haven’t already, download and install the WebStorm IDE from the Jet Brains website
http://www.jetbrains.com/webstorm/
Step 3. Open Webstorm and select File > new project
Select HTML5 Boilerplate, this give us a nice versitile starting project structure.
Step 4.
Create a folder inside the js folder to contain your TypeScript files. I have named mine ‘scripts’ .
Then right click on your folder and create your first TypeScript file by right clicking and selecting New > TypeScript File
Name your file what ever you like, but give it the extension .ts, I have named mine main.ts
Step 5.
If this is your first time using Webstorm on your computer, it will likely give you a prompt about file watchers.
Step 6.
Click the ‘Add watcher’ link, and you should see the following panel open. Click on the ‘…’ button circled in red.
Step 7.
Navigate to your TypeScript SDK
The path is indicated in the image below, however it might vary depening if your OS is 32 or 64 bit.
Step 8.
To run a quick test, open the main.ts file you creates and type
alert("hello world");
Save the file and you will notice that there is a drop down available on your main.ts file in the explorer panel. Click it and you will see that a js file has been compiled based on your TypeScript file. Pretty cool
IMPORTANT.
You must import the main.js file into your index.html file (before closing </body> tag is good). DO NOT import the .ts file as this will not work
Step 9.
Time to run it and see what happens.
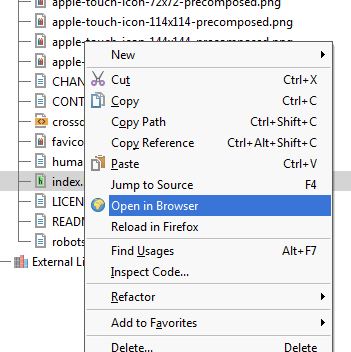
Right click the index.html file in your explorer and select ‘Open in Browser’
If all goes well you should a “hello world” popup box
Stay tuned for more posts on TypeScript…


I think Java is actually quite cool, annoying all about the amount of changes they’ve and yet fascinating information!